Wednesday, May 16, 2012

Trip to Los Cabos (May 2012 - Day 1)...Mother's Day Week Vacation Began


Since my mom has been visiting me in LA since last month, I decided to take her to Los Cabos for vacation as a Mother's Day gift.  We left Monday (a day after Mother's Day), and it was going to be just two of us to enjoy the resort for 5 days.

Photobucket Photobucket
From LAX to San Jose del Cabo is just a little short of 2-hour flight.  We had a light lunch in the airplane, which was actually not too bad.  Our excitement grew more as we got closer to the destination.

Photobucket Photobucket Photobucket Photobucket Photobucket
Our hotel was about 15 minutes from the airport by shuttle.  We got a nice 1 bed room suite with the ocean-front view!

Photobucket Photobucket Photobucket
The beach looked very nice, but we were both quite shocked to see the big waves in the ocean.  You are not supposed to swim in the ocean here.  Every time the water hits the beach, there was a big roar.  Wow.

Photobucket Photobucket
For our first night dinner, we chose a seafood restaurant by the beach.  We had a toast with pina colada.  Nice.

Photobucket Photobucket Photobucket
In was in a mood for "red" dishes...I had shrimp cocktail, tortilla soup, and mahimahi with tomato sauce.  It was a nice rustic Mexican dinner.

After dinner, we drank more in the bar, then in our balcony...party girls:-)

Sunday, May 13, 2012

Making Natto (Fermented Soybeans) from Scratch


Natto (fermented soybeans) is one of my all time favorite foods...or, maybe it's the all time favorite food of mine.  That's why I'm extremely excited about my homemade natto.  It tastes amazing...the best natto I've ever tasted!  Now, I can't go back to commercial natto, anymore.  And the great thing about homemade natto is that it's very easy to make, as long as you have the right equipments and patience.  Ingredients for natto are only soybeans, water and natto bacteria! For soybeans, I suggest you choose small organic non-GMO kind.

Photobucket
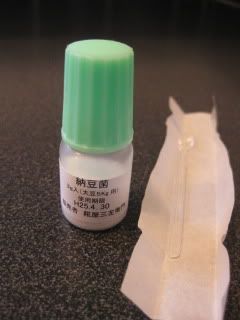
As a fermentation starter, you need Natto bacteria (culture).  It comes with a special spoon to measure it.  I brought it back from Japan, but you can also order (different brands) in the US.

Photobucket
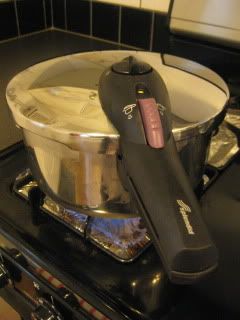
You can use a regular pot to cook soybeans, but pressure cooker will save so much of your time.  I bought a pressure cooker just for this purpose!

Photobucket
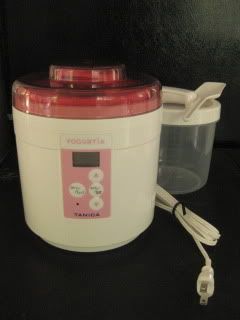
My special secret weapon...yogurt maker.  I also brought it back from Japan.  It's Tanica's Yogurtia, which is a light-weight and extremely functional yogurt maker with temperature-control and timer functions.  Tanica made the first yogurt maker in Japan in 1971, and their yogurt makers are 100% manufactured and quality-checked in Japan.  If you order a different brand's yogurt maker in the US, I would suggest that it has both temperature setting and timer.

Natto is a super-health food.  The health benefits of Natto are considered to be extremely remarkable with high level of different kinds of vitamins, fiber, calcium, protein, etc. associated with enzymes in natto as well as soybean itself.  Nattokinase (enzyme in natto) is considered to help making your blood smoother.

Now, here's how to make natto from scratch.

Photobucket
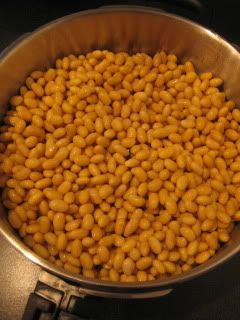
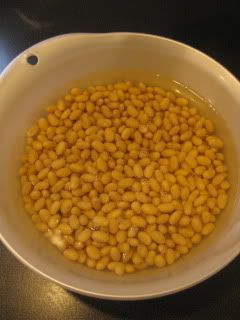
Rinse and soak 200g (about 7 oz) soybeans in ample amount of water overnight (about 12 hours).

Photobucket Photobucket Photobucket
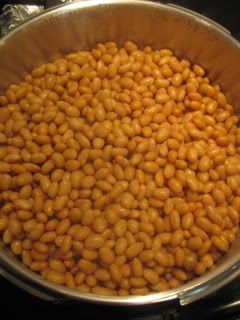
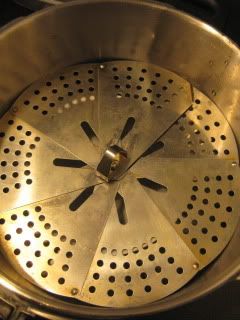
In a 4-qt or larger pressure cooker, fill about 350 ml (about 1.5 cups) water, and set a steam grate or basket.  Add the drained soybeans and cover.  Set over high heat.  Once the pressure is built, reduce the heat to low and cook for 45minutes.  Turn off the heat and let it rest for 20 minutes before opening the lid.  The beans should be very soft - you might feel they are almost too soft, but they will become tighter after fermentation.

Meanwhile, make sure to sterilize any containers and spoons to be used for fermenting soybeans.  For a metal spoon, I pour boiling water, and for container and ramekin, I boil water in them microwave.  This will prevent possibly letting the unwelcome germs to grow during fermentation.

Photobucket
In a sterilized ramekin, combine a little shy of 1 teaspoon water with 0.2 g (about 0.007 oz - 2 heaping spoonfuls with a special measuring spoon) natto bacteria.  Set aside.

Photobucket
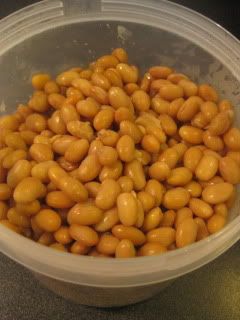
Transfer the soybeans to sterilized yogurt maker's container and add the natto bacteria solution while the beans are still hot.  Stir with a sterilized spoon gently to evenly distribute the bacteria.  (I normally do this in two steps - transfer half amount of soybeans to a container and stir with half amount of the natto bacteria solution, then add the remaining soybeans and natto bacteria solution and stir again.)


Photobucket
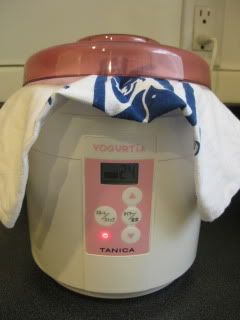
Set the container with the soybeans in yogurt maker.  Cover with a piece of cloth and lid.  The lid should be slightly shifted so that there is enough space for the bacteria to breathe (very important for fermentation).  The cloth will absorb evaporated moistures during fermentation and prevent the beans from getting wet from water drops.  Set the temperature of yogurt maker at 45C (113F - about 110F is ok) degrees and timer  for 24 hours.

Photobucket
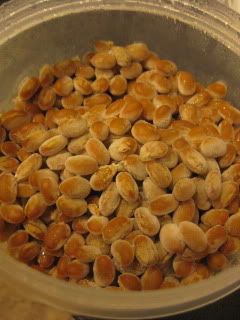
After 12 hours, you can see the beans are getting fermented.

Photobucket Photobucket
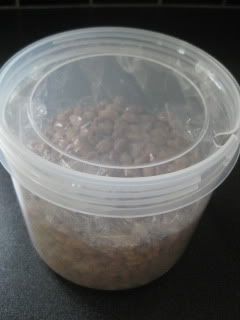
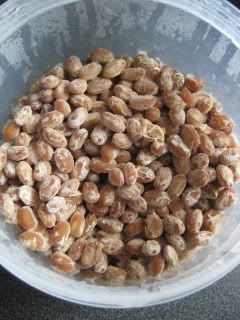
After 24 hours, beans are really fermented and ready to rest.  Cover the surface with a piece of plastic (to prevent the natto from getting dry) and again with a lid.  Let the natto rest in refrigerator for 48 hours.  This resting time will make the flavor of the natto settle.

Photobucket Photobucket Photobucket
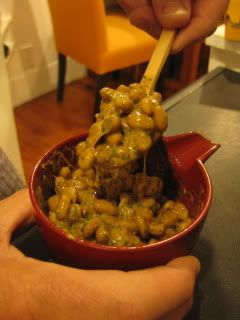
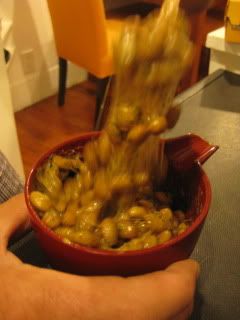
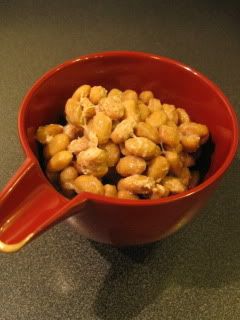
Natto is now ready!  To enjoy natto, you can transfer the amount you want to eat to a small bowl and mix by spoon for at least 100 times before adding any seasoning.  The more you stir, the more the amount of amino acid and enzymes in natto will be increased, and natto becomes better in both flavor and nutrition.  Add your choice of seasoning (I like natto with just a pinch of sea salt, or sometimes with iri-zake, soy sauce, karashi mustard, and ao-nori).
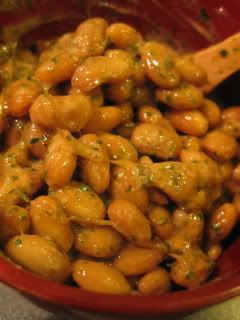
Photobucket Photobucket
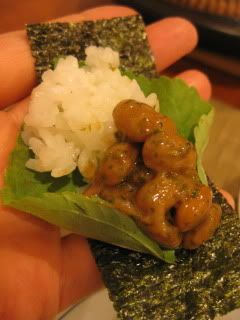
Enjoy natto with freshly-made donabe rice.  (In the picture, I made nori wrap with natto, sesame leaf, and rice).


Happy healthy natto life.  Happy donabe life.

Saturday, May 12, 2012

Toban-baked Mountain Yam ("Yama-imo")


Another wonderful izakaya-style dish.
This time, with my Iga-yaki Toban (donabe skillet).

Photobucket Photobucket
I shredded some about 7 oz yama-imo (mountain yam), and mixed with 2T steamed shirasu (baby white fish), 1.5tsp shio-koji (can be substituted with a good pinch of sea salt), 1 tspkuzuko (arrowroot starch), and 2T shredded Swiss cheese. The mixture was poured into oiled heated toban, and topped with some more cheese. It was cooked for 4-5 minutes over medium-heat and finished in broiler to brown the surface.  To serve, it was garnished with some minced scallion.  For vegetarian version, you can simply omit shirasu fish, and it would still taste very flavorful.

It was great. Outside was nicely crisp and inside was gooey. Another sake-friendly dish.

Happy donabe life.

Thursday, May 10, 2012

Donabe Steam-roasted Soy-Rosemary Salmon


Some people still have negative perception about microwave cooking and they think that's for lazy people.  But, I disagree...

With right cookware and method, you can make a serious dish which could taste as good or even better than stove-top cooking.  Donabe Steam-Roaster, "Tochinsai", is indeed a brilliant cooking microwavable cooking tool, and it's also been very popular among serious foodies who are often too busy to cook too elaborate recipes.

When I'm busy, Tochinsai saves my time, and this steam-roasted soy rosemary salmon is one of my favorite busy day recipes lately.  You just need the short time to marinade and cook.  The additional bonus is (just like other donabe) you can serve it right out of the donabe at the table.  It makes a beautiful presentation.


Photobucket Photobucket
First, marinade salmon filets in sake-soy based sauce with rosemary for 30 minutes.  Then, set the filets with rosemary in Tochinsai.


Photobucket Photobucket
Cover and cook for about 3 minutes in microwave (700-watt power).  That's really it!  And the salmon is so fluffy with very nice flavors of mild rosemary and soy.  Excess grease falls to the bottom from the grate, so the fish doesn't smell or taste greasy at all.  I just need a bowl of donabe rice to complete a meal.  Very happy.

You can find the recipe on toiro's website.  Please check it out.

Happy donabe life.

Wednesday, May 9, 2012

Donabe Steam-fry Shio-koji Dak Kalbi (Korean-style spicy chicken)


Since my recent trip to Korea, I've been making more Korean-style dishes lately...with my donabe!
Especially because I brought back a jar of premium-quality kochujang (spicy bean paste) from Seoul, I wanted to make something which I can really enjoy the flavor of it the other night.

So, I decided to make Dak Galbi, Naoko-style.  Dak Galbi is a spicy chicken dish which is very popular in Korea.  There are even restaurants which specialize in Dak Galbi in Korea.  I made the dish with my Tagine-style Donabe, "Fukkura-san"...perfect donabe for this dish!

Photobucket
First, make layers of ingredients in the order of 1T sesame oil, 1/2 onion (sliced), 6 oz king oyster mushrooms (sliced - I sun-dried them for a day, but you can use fresh kind, too), and 10 oz chicken thighs (boneless and skinless, marinated in 1T shio-koji for a few hours - you can substitute shio-koji with 1/2 tsp sea salt).  Drizzle 1T sake and cover with lid (filled in water for 5 minutes and drained bofore use - the lid absorbs moisture and gives a nice steam-effect during cooking) and bring over medium-heat.  Cook for 5 minutes.

Photobucket Photobucket
Uncover and pour Dak Galbi sauce (mix together 1.5T kochujang, 1T sake, 1tsp honey, 1 tsp soy sauce, 1/2T grated ginger, 1tsp grated garlic, and 3T water).  Add a few leaves of cabbage (tear by hands).  Cover again and cook for 8-10 minutes or until everything is cooked through.  Meanwhile, uncover and stir a couple of times.

Photobucket Photobucket
Uncover again and add a good handful of crysanthemum leaves and stir.  Bring the donabe to the table and serve.

The taste was super good!  The complex flavor of the spices lingered on palate and made me want more and more.  Because it was cooked in donabe, the texture was really juicy and succulent.  Delicious.

Happy donabe life.

Tuesday, May 8, 2012

Donabe-steamed Shio-koji Shrimp Gyoza


I was in a mood for steamed gyoza the other night.
With my donabe-steamer, "Mushi Nabe", I can cook and serve these steamy dumplings right at the dining table.

Photobucket Photobucket
First, 8 oz shrimp (peeled, deveined, and minced), 1 tsp minced ginger, 1/4 tsp minced garlic, 1T katakuriko (potato starch), 1T sake, 1 tsp shio-koji (or you can substitute with a pinch of salt), 1/4 tsp sesame oil, and a pinch of black pepper were mixed by hand in a bowl.

Photobucket Photobucket
The filling was covered air-tight with a piece of plastic wrap and rested in refrigerator for about 30 minutes.  Then, it was wrapped in gyoza wrappers.  Mushi Nabe was set with water inside over a portable gas burner.

Photobucket Photobucket Photobucket
Once the water started boiling, gyoza was arranged on a bed of sliced cabbage in Mushi Nabe.  After about 8 minutes of steaming, gyoza was ready.  It was served with soy sauce and black vinegar mixture (2:1 ratio) with a little karashi mustard.  The texture of the dumpling was so bouncy and juicy.  It was so light that I could keep eating so many. We ended up doing 3 batches of it.  Wonderful dish.

Happy donabe life.